By default, layers will stack on top of each other using the "normal" blending mode. But you can exploit a range of blending modes to achieve various effects. The three main blending modes we'll focus on are "multiply", "screen" and "overlay". It's difficult to explain in words what the blending modes do, so here are some graphic examples.
Here are the results you can achieve by layering the same image on top of itself. Keep in mind, you can still adjust the "opacity" and/or "fill" of the layer blending. It takes less time to duplicate a layer and change its layer blending mode than it does to make "adjustments". Layer blending modes are also non-destructive - meaning if you screw up you don't have to "undo" all the way back to a previous step, you can just hide the layer.
Here are the results you can expect when blending two different images. One great thing about the blending modes is that you can easily replace certain colors by choosing one blending mode over another. No more using the "magic wand tool" or "lasso tool" with a "paint bucket tool" to change colors like a noob. If you perform lots of color or texture adjustments, this trick will definitely increase your workflow.
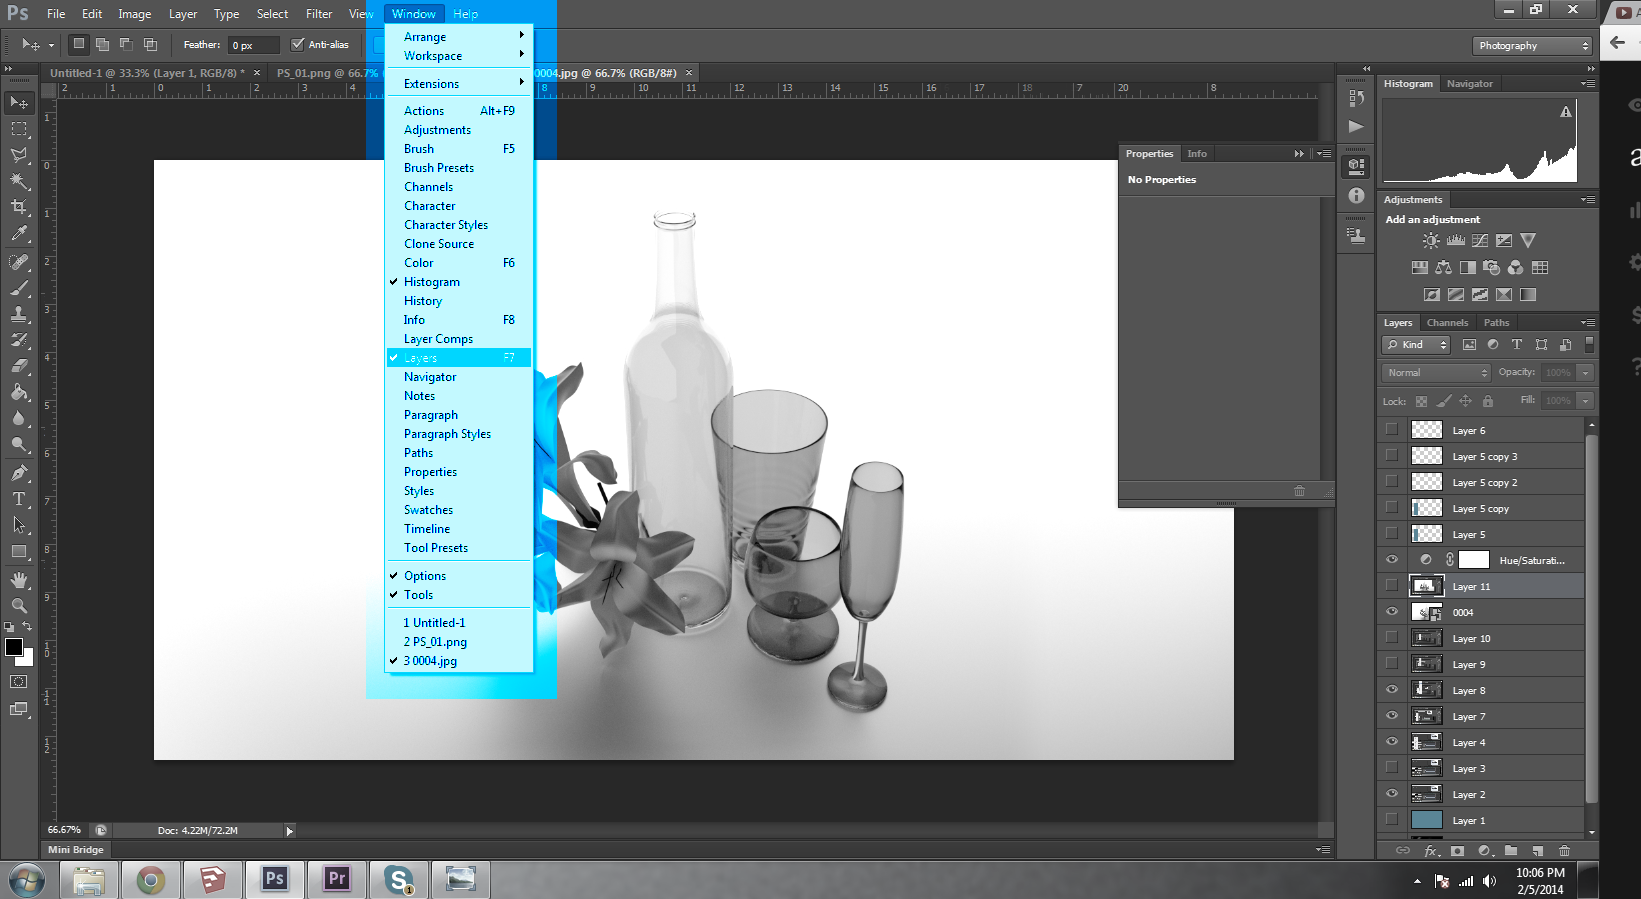
Here is where the blending modes live in Photoshop.
Just go to "Window" and pull your cursor down to "Layers" . When it has a check next to it, it should be activated and visible somewhere - typically the Layers window will already be open by default and is docked on the right of the display. Just pull down the tab that reads "normal" and you will find all of your blending modes.
Here is where the blending modes live in Premiere.
Just go to "Window" and pull your cursor down to "Effect Controls". When it has a check next to it, it should be activated and visible somewhere - typically the Effect Controls window will already be open by default and is docked on the top left of the display. Under the effect "Opacity" you will find a "Blend Mode" indicator which has a tabbed option that reads "Normal" by default. Click the tab to access your alternative blending mode options.
Here is where the blending modes live in Sketchbook Pro for iPad.
Just go to the Layers tab. If you press the option that reads "Normal" you will find three more options within the selection tab.
When I first found out about blending modes, my mind was blown - so if I just taught you something new and there isn't mind-splatter all over your wall right now, you have got to try them out.
If you want a more detailed description of layer blending modes, this photoblogspot.com post is a great resource.


